One last word! Quilting the border on the Treasures from the scrap bin quilt.
January 17, 2020
2 Comments

Now that the holidays are well and truly over, and we have started the year 2020. I am back in my sewing room while the house is peacefully quiet, my process for starting the new year is to finish some of the quilts that did not get finished at the end of 2019. One of the quilts to finish is the Treasures from the scrap bin quilt from the sew along, and as I am working on it I would be like to share my thoughts with you.
All I have left to quilt on the Treasures from the scrap bin quilt are the outside borders. I have already stitched in the ditch around the applique and written about my process for this here. Now I will be stitching in the ditch all the strips that form the border.
I am using fine thread 'The bottom line' 60 weight polyester in the bobbin and 100 weight polyester 'Wonderfil Invisifil' in the top. To start and stop, I just do a backstitch to hold the stitches in place as the thread is so fine it is not noticeable. I also jump the thread from one area to another making sure to backstitch at the beginning and end of each section and clip the thread afterward.

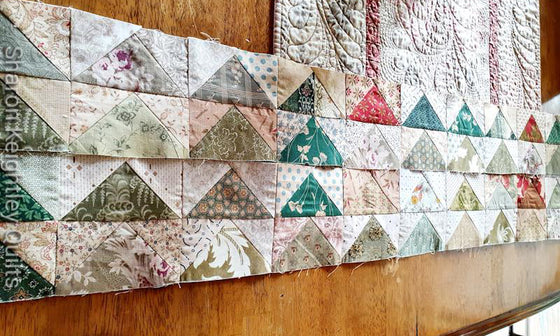
Getting ready to start quilting, the pic above shows how uneven the quilt looks, even with the ditch stitching done around the applique.

I love the way this holds all the strips in place, they look so much neater (tidier) after the ditch stitching is done. The ditch stitching holds everything in place and helps the border lay flat.


All the quilting is done, only the binding to go.
I hope this information was helpful to you, and you are having a peaceful time in your sewing room too.
Happy Stitching
Sharon

You can find more of my Quilty Ramblings blog posts on all things quilting here
Browse through my downloadable PDF patterns available here
See more of my video tutorials here
To keep up with my blog posts on the Quilty Ramblings blog, sign up to the newsletter below to have my blog post drop straight into your email.

Related Posts

Antique Red and Green sampler quilts have always held a fascination for me. I decided it was time to make my own and ...
Read More
Its been a while since I have written a blog post, we are currently locked down and you would think there would be ti...
Read More
Well I know I have talked about this topic before, you can read about my previous post here where I talk about using1...
Read More2 Responses
Leave a comment


Sharon Keightley
January 18, 2020
HI Vangie
So glad you enjoyed my tip. Thanks so much for the comment, it has made my day.