Sewing Flying Geese Borders
May 20, 2022

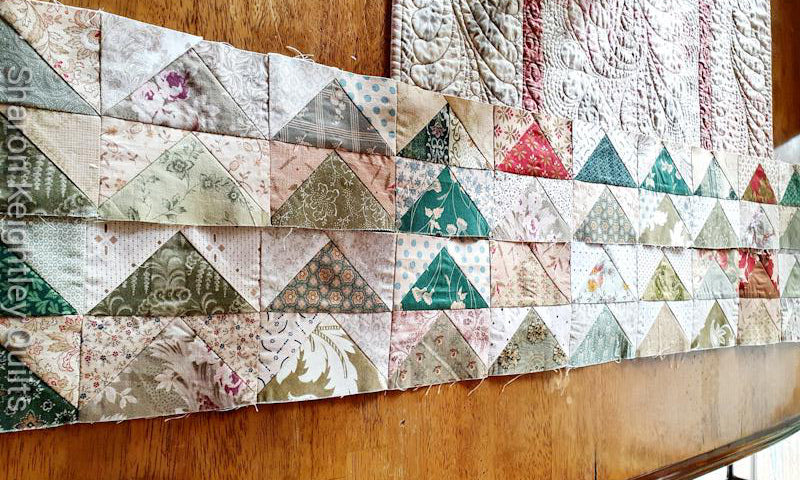
Recently I have been sharing pictures on social media of the flying geese borders I have made for my sons quilt. These were made with all of the left over pieces (scraps) that have accumulated over time. I chose to use a large selection of the green fabrics I had, and a large selection of light print fabrics left over from several other quilts.
My son is a nature lover, he loves nothing more than being in his plant nursery and growing plants native to New Zealand from seeds he has collected. So of course his quilt had to be green.
I used the method of folded corners, (connectors) to make these flying geese units. But instead of drawing a line from corner to corner on the light print fabrics, I cut the corners to the correct size using the creative grids folded corner clipper ruler. You can see how it works here or here.
Here are a few photos of how I made my Flying Geese using the folded corner clipper ruler.
Before I used this ruler I would have drawn a line, and then sewn on the line. Folded the corner over and cut away the excess.
Now I trim my squares before stitching them with the folded corner clipper ruler, then sew the seam. Fold the corner back and press.


Repeat for the other side, although remember to turn your ruler so you are cutting away the top left corner.


I use a block lock ruler to trim away any excess fabric, making it the perfect size.

I love this method because it allows me to use as many different fabrics as I like. You can also make the Flying Geese units using the four at a time method, this will be a little more controlled but you will still get a scrappy mix by choosing four different light print squares. You can read my blog post here.
The reason I have done this blog post is because I was asked the question.
"How do you press the borders?"
So I am going to try to answer that question here, with pictures as it is a little bit different than what you might expect.
I like to have my seam intersections as flat as possible, because I will be doing the machine quilting I want it to go as smoothly as possible. So when pressing seams I always have that in mind.
Firstly I like to press my Flying Geese units towards the light print fabric as shown above, for these reasons. If I press towards the light print fabric it makes the stitching cross on back of the block so you can easily see where to sew, so as not to cut off your points. Also I like to stitch in the ditch. The ditch stitching can then be done on all the green print fabric triangles, making it easier.
I then sew the Flying Geese units together in pairs and press towards the top Flying Geese unit.

I then sew the pairs together, creating a four patch. To avoid creating bulk at the seam intersection I clip the seam as shown below, just a few threads away from the stitching line, then I can turn the seam back so that the two seams alternate correctly avoiding the bulk.

I push each seam allowances so they are opposing, opening up the seam allowances where they meet in the centre so they can be spun. This makes a lovely flat intersection.

I continue to press in this manner, until I have completed the border.

I few more pictures of my Flying Geese borders.


I hope this was helpful to you, and answered your questions.
Now its on to the quilting......

I hope this was helpful, I am always trying new methods. The more ways you know how to do something the more options you have. It is also great to have a plan when pressing your seams, knowing a few tricks always helps. It s always good to see how someone else does things.
If anyone has any other tips to share I would love to know, please leave them in a comment.
Happy Stitching
Sharon
You can find the blocks here for the Adelicia Sampler Quilt
Please share this post with your quilting friends, the more the merrier as they say.
Keep up with all the posts via the Sharon Keightley Facebook page. Instagram and the Newsletter (you can sign up here) will give updates of all blog posts.


You can find more of my Quilty Ramblings blog posts on all things quilting here
Browse through my downloadable PDF patterns available here
Related Posts

Today I am looking at some of the tips I have to share with you all for block one.
I made this block using two differ...
Read More
Hello Everyone
I hope you had a wonderful Xmas and New Year, with lots of promise and hope for things to come in 2022...
Read More
Antique Red and Green sampler quilts have always held a fascination for me. I decided it was time to make my own and ...
Read MoreLeave a comment


