Zig-Zag borders | Sharon Keightley Quilts

Zig-Zag borders

November 14, 2018 8 Comments

Zig-Zag Border-Sharon Keightley Quilts

It's been such a long time since I posted, I am going to start today off with a post about the Zig-Zag border I am making for my Roses quilt.

There are many ways to make a Zig-Zag border, I have chosen to use half square triangles. 

Here's how it works.

I cut 2 1/2 inch strips from a dark print and a light print then matched the light and dark print fabrics with right sides facing. I used a half square triangle ruler to cut out the pieces. Taking them to the sewing machine and sewing them together with a 1/4 inch seam. I like this method, it's fast and requires very little trimming. 

Cutting half square triangle units

Seam allowance for half square triangle units - Sharon Keightley Quilts

Pressing seams open - Sharon Keightley Quilts

I have pressed my seams open, thinking that it would be easier when sewing the half-square triangle units together. Because I have pressed the seams open. I have used a smaller stitch length on my machine it is about a 1.5 -2.0. I normally sew my seams at a 2.0 as I like the look of the smaller stitch. I also feel it is stronger and won't come apart so easily. It is also important when pressing your seams open to make sure your tension is good. I like quite a firm, even tension, a loose tension will pull apart easily.

Half square triangles waiting to be trimmed - Sharon Keightley Quilts

Untrimmed units

Half square triangle units all trimmed - Sharon Keightley Quilts

Trimmed units

Trimming half square triangle units - Sharon Keightley Quilts

Use the 45-degree line on the ruler to trim units.

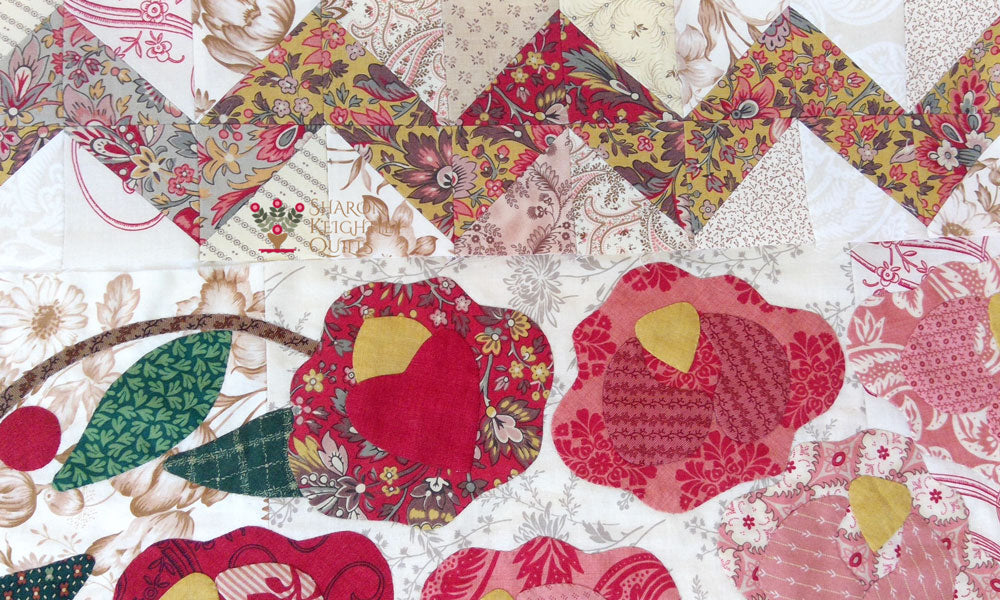
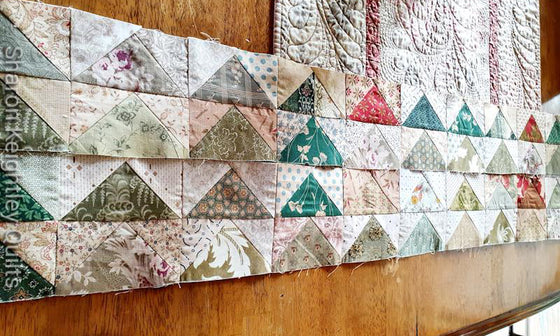
I sewed the half-square triangle units together to make flying geese units. I also added in a few similar dark prints in different colors just to mix it up and make it interesting.

I then sewed them together in strips the length of my border. Sewing the two strips together lengthwise to create the Zig-Zag look I wanted.

It is fun to play with half-square triangles, you can create so many designs with this fun little block.

While making the decision to add the border I went through a few color choices, I did not like the more solid gold fabric, although this had been my original choice. A design wall really helps when auditioning fabric choices.  I love the more subtle gold floral print for the Zig-Zag but thought the look of only one lighter print fabric was a little overwhelming so as usual I added more fabrics to the mix and love the look.

Deciding on colour - Sharon Keightley Quilts    

I then added the grey and red colorways of the same print for some interest.

Zig-Zag Border - Sharon Keightley Quilts

I have three more Zig-Zag borders to make. I hope you enjoyed seeing my progress.

Happy Stitching

Sharon

Autumn Bouquet Book | Sharon Keightley Quilts

You can find more of my Quilty Ramblings blog posts on all things quilting here

Take a look at some of the downloadable PDF patterns available

See more of my video tutorials here

To keep up with my blog posts on the Quilty Ramblings blog, sign up to the newsletter below to have my blog post drop straight into your email.

Sharon Keightley Quilts


8 Responses

Claudia Dimond
Claudia Dimond

June 01, 2019

Perfect, all the details make such a beautiful quilt.

Barbara Jenson
Barbara Jenson

June 01, 2019

Thank you so much for the lesson there’s always a new way of doing things. I love the border and look forward to seeing the quilt.

Janet
Janet

January 25, 2019

Interesting! Your fabrics are so beautiful. I never would of thought of pressing the seams open for an hst but totally makes sense for managing bulk.

Sue
Sue

November 25, 2018

Great tutorial Sharon. Thanks!

Sharon Keightley
Sharon Keightley

November 16, 2018

Hello Eleanor, the roses quilt is a work in progress and I am really enjoying every stitch. The pattern will be available sometime next year.

Eleanor Kay Hunzinger

November 16, 2018

Looks like it will be a beautiful quilt! When will the pattern be out?

Sharon Keightley
Sharon Keightley

November 15, 2018

Dee thank you for your comment. So glad you enjoyed my post and it was helpful to you. Yes! It is easy to do and Zig-Zag borders always look so fabulous.

Dee
Dee

November 15, 2018

Sharon thanks! That’s great easy when you know how! 😁

Leave a comment


Also in Sharon Keightley Quilts - Quilty Ramblings

Making Vines for Adelicia Sampler Quilt Tutorial

June 28, 2022 1 Comment

Today I thought I would share my method for creating the vines in the Adelicia Sampler Quilt. I love how the vines have a little extra dimension using this easy method. Take a look at the video to see me working on the vines and talking about my process.

Continue Reading

Sewing Flying Geese Borders

May 20, 2022

How to press a Flying Geese Border ? This is the question I was asked so I have done my best to answer as it is not exactly what you might be expecting to see. Read more to see how I pressed the seams to get nice flat intersections. 


Continue Reading

Sewing Flying Geese method four at a time

April 27, 2022

Making four Flying Geese units at a time is a great time saver, and a wonderful method. I love to oversize the units and trim them down to the correct size for perfect blocks. Read how I go about making these versatile units that I use in almost every quilt I make.


Continue Reading