Settings for my Arrow Crown Block
January 31, 2012
3 Comments
Hello
Well its a lovely day here today, sitting sewing is hard when the sunshine is pulling you outside.
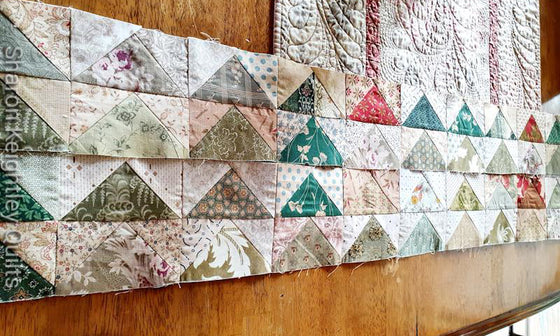
I have been working on my Arrow Crown Block and have had loads of fun playing with fabric selections and arrangements for this block.
It is amazing how re-arranging the fabrics makes a difference to the look of the block. Take a look at my pictures and see which arrangement you like the best.
[caption id="attachment_796" align="alignnone" width="300" caption="Version One"]

[/caption]
[caption id="attachment_797" align="alignnone" width="300" caption="Version Two"]

[/caption]
[caption id="attachment_798" align="alignnone" width="300" caption="Version Three"]

[/caption]
[caption id="attachment_799" align="alignnone" width="300" caption="Version Four"]

[/caption]
I love using a design wall for doing this, you can really see what is going on with your block. I also take a photo of the block each time, before I change it so I can put the fabrics back in the right places when I have decided on my layout. I will now be busy piecing my block together and will post the results in my next post. But maybe a few hours of sunshine will come first.
As you can see I love busy quilts and love to use as many fabrics as I can to get the look I like. This is only a personal preference as you can create a lovely look with only a few fabrics if that is your choice. I would love to see some of the blocks if you decide to make them, if you send me your pictures I will gladly add them to the blog to share with everyone.
The pattern will be sent in the
Pine Valley Quilts February newsletter, so don't forget to subscribe. You can do so on my blog or send your email address to me @ sharon@pinevalley.co.nz
Happy Stitching
Sharon
3 Responses
Leave a comment


Leeanne
August 03, 2016
I quite like version four…just my 2cents worth!