My Home Town Border | Sharon Keightley Quilts

My Home Town Border

May 11, 2013 5 Comments

Hello Everyone

After all the wet and horrible weather we have had recently, we have a beautiful day here. Part of me is thinking I should  be outside in my garden enjoying the sunshine but I could not keep away from my sewing room. I have been busy today sewing the border for my quilt. I am eager to see how this will look, and hope my plan works. It is always exciting to see if what you envision works out.

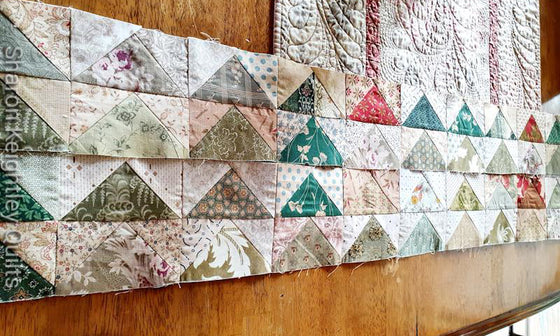
I have decided to make the border from two inch squares, I have always loved this ( organized ) scrappy look. I say organized because I have to admit to being a bit of a control freak. I cannot relax and just sew these together randomly. I like to organize the colours and make sure there are not two of the same fabric sitting together. ( famous last words as this usually always happens and you do not notice it until the quilt is finished ) Therefore I cut the squares individually and I do not try to save time by sewing strips together, then cross cutting. Cutting the squares individually also gives me a more random look.

This border also gives me the chance to use all the fabrics in the fat 1/4 bundle. It has amazed me just how far this bundle has stretched. Don't we all love Fat Quarters.

Here is my progress so far. [caption id="attachment_1572" align="aligncenter" width="300"]My organized pile of squares My organized pile of squares[/caption] [caption id="attachment_1575" align="aligncenter" width="207"]Sewing the squares into pairs. Sewing the squares into pairs.[/caption] [caption id="attachment_1574" align="aligncenter" width="300"]Sewing the pairs together. Sewing the pairs together.[/caption] [caption id="attachment_1573" align="aligncenter" width="300"]Now to sew these together, until my border is the correct size. Now to sew these together, until my border is the correct size.[/caption]

So much fun !

I can't wait to show you the finished result in my next post.

Happy Stitching

Sharon


5 Responses

Elizabeth Bryan
Elizabeth Bryan

August 03, 2016

the colours are so yummy. Can’t wait to see more progress photos

Ms Lottie
Ms Lottie

August 03, 2016

I’ve been have a wee flick through your blog and your quilts are lovely. Love the fabrics you’re using for this one.

Ann
Ann

August 03, 2016

Your quilts are amazing. Such beautiful work. I have enjoyed reading past posts.

Donna-Maree
Donna-Maree

August 03, 2016

Your border looks great, can’t wait to see it complete. Looking forward to seeing the quilt top too. I am really itching to do some sewing too, however still have quite a bit of unpacking and sorting to do before I can go there. The joys of moving from one city to another.

Sue
Sue

August 03, 2016

Looking good. Great colours!

Leave a comment


Also in Sharon Keightley Quilts - Quilty Ramblings

Making Vines for Adelicia Sampler Quilt Tutorial

June 28, 2022 1 Comment

Today I thought I would share my method for creating the vines in the Adelicia Sampler Quilt. I love how the vines have a little extra dimension using this easy method. Take a look at the video to see me working on the vines and talking about my process.

Continue Reading

Sewing Flying Geese Borders

May 20, 2022

How to press a Flying Geese Border ? This is the question I was asked so I have done my best to answer as it is not exactly what you might be expecting to see. Read more to see how I pressed the seams to get nice flat intersections. 


Continue Reading

Sewing Flying Geese method four at a time

April 27, 2022

Making four Flying Geese units at a time is a great time saver, and a wonderful method. I love to oversize the units and trim them down to the correct size for perfect blocks. Read how I go about making these versatile units that I use in almost every quilt I make.


Continue Reading