Flying Geese Fun | Sharon Keightley Quilts

Flying Geese Fun

January 05, 2016 7 Comments

Flying Geese Fun

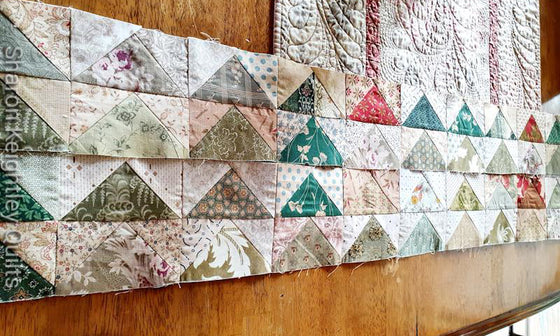
My New Year has been filled with visiting family and old friends, catching up on tales of past times and making new memories in the process. Today I am having Flying Geese Fun. Piles of Flying Geese look so productive and fun.

Flying Geese Fun | Pine Valley Quilts 

The tips I have learnt making these little bundles of gorgeousness are:

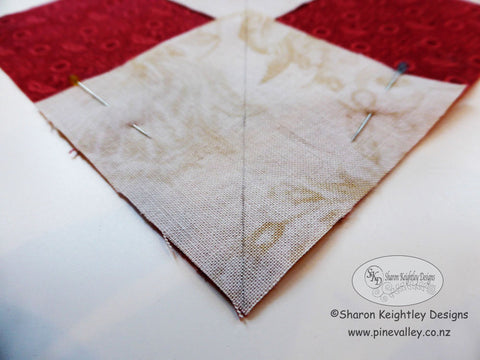
Cutting is important, make sure your pieces are cut correctly. Start off the way you mean to continue. Pin your background squares in place making sure the edges are together and not overlapping anywhere.

Flying Geese Fun | Pine Valley Quilts

Flying Geese Fun | Pine Valley Quilts

Stitch with a scant 1/4 inch seam, I place the right side of my presser foot ON the drawn line on the squares NOT next to it.

Flying Geese Fun | Pine Valley Quilts

Finger press, do NOT iron until you have finished. When you do finally use the iron be careful not to distort the fabric. Press always with the straight of fabric grain only.

Press ! NOT iron.

Flying Geese Fun | Pine Valley Quilts

Place your iron straight with the grain there is less movement with straight of grain, not as below with the bias, this will stretch your block out of whack.

Flying Geese Fun | Pine Valley Quilts

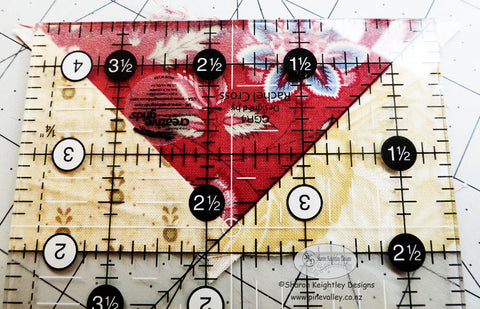
Trim with a ruler that has a 45 degree line to ensure that you end up with square Flying Geese Units. I use the ruler as in the picture below. You can see the 45 degree line runs along the diagonal line of the triangle (Goose) See the White circle marking the white centre line placed at exactly 1/4 inch from the top of the unit. Trim off the dog ears.
Flying Geese Fun | Pine Valley Quilts

Take a look at the tutorial for making Flying Geese Blocks.

These are tips that work for me, do you have any tips to add ? I would love to know your tips too........ Happy New Year Happy Stitching Sharon


7 Responses

Leeanne
Leeanne

August 03, 2016

Play time at your house!! Can I come play too? :-)

Hilda
Hilda

August 03, 2016

Looks fun – thanks for the piecing tips :)
Happy New Year to you too

audrey
audrey

August 03, 2016

I am terrible with this method, but looks like I’m not careful to line my pieces up! Great tutorial here. Are you doing the geese for Quilty 365? I noticed your link.:)

elainesuller
elainesuller

August 03, 2016

thank you for the tutorial, love the fabrics you have used!

Cirlene
Cirlene

August 03, 2016

Obrigada pelo tutorial. Amo muito! Beijos

Sharon Keightley
Sharon Keightley

August 03, 2016

Thank you so much Cirlene, so glad you enjoyed my tutorial.

Jan
Jan

August 03, 2016

Just found your blog, love your work!

Leave a comment


Also in Sharon Keightley Quilts - Quilty Ramblings

Making Vines for Adelicia Sampler Quilt Tutorial

June 28, 2022 1 Comment

Today I thought I would share my method for creating the vines in the Adelicia Sampler Quilt. I love how the vines have a little extra dimension using this easy method. Take a look at the video to see me working on the vines and talking about my process.

Continue Reading

Sewing Flying Geese Borders

May 20, 2022

How to press a Flying Geese Border ? This is the question I was asked so I have done my best to answer as it is not exactly what you might be expecting to see. Read more to see how I pressed the seams to get nice flat intersections. 


Continue Reading

Sewing Flying Geese method four at a time

April 27, 2022

Making four Flying Geese units at a time is a great time saver, and a wonderful method. I love to oversize the units and trim them down to the correct size for perfect blocks. Read how I go about making these versatile units that I use in almost every quilt I make.


Continue Reading